Thanks for stopping by! We're two cousins who love to craft on the cheap and share our ideas. We'd love for you to stay awhile, pull up your Pin it! button, sewing machine, and let us know what you think!

Friday, December 30, 2011

Fab 5 Friday

Okay, this has been a crazy week! Hopefully everyone enjoyed their Christmas! We had a nice one, with the fun of watching a 3 year old and 17 month old tear into presents, and just keep wanting the next one to tear, rather than the toys!Smile Cute little stinks. Anyway, after dinner on Christmas, we got to work (I know, not cool) putting Christmas away, decorations away, and packing up clothes and such. We did take a break after an hour plus, and relaxed watching a movie I hadn’t seen…The Corpse Bride. I love Johnny in all his reincarnations, be he animated or not. Smile Monday, my hubby had to go and fix something at the business we own, while I took apart the baby’s crib, and spent the 10 degree morning loading up our Honda Pilot. (love that car!) I filled it literally to the brim, minus the baby’s car seat, that you can barely make out in this picture:

image

We put my other child’s booster seat in my hubby’s car, and when he got his stuff done, we loaded up his car as much as possible. Just another picture to see how full my car was.

image

From the back, opening the trunk.

image

My hubby’s was just as full, but it’s a little 4 door car, and I didn’t make it over before they got it started unloading, but just realize it was FULL. 5th time moving this year. So why all this fun? Because my hubby got a new job, so we had to move in with my parents, moving from his parents, (oh boy, don’t get me started on our hectic life. I’d rather just forget 2011 as a year). Originally, we were going to have the week to move, but as Natalie mentioned in her last post, our grandpa passed away, so we had to get moved in before the funeral, on Tuesday. Makes for a bit of a crazy Christmas! Whew, we’re moved in, and have just the bare necessities, until we figure out a couple more things with our life, then we’ll get our own place and the rest of our stuff, currently residing in Idaho.

On to the fun stuff! So we know I have a major LOVE for Pinterest, right? Well, just before Thanksgiving, the silly site decided I didn’t have an account, so I couldn’t log on. After a month of wanting to rip out my hair, I finally got it to work yesterday! YEAH!!!! I’m back in the game! So here’s my fabulous-ness from this week! This was one of the first things I pinned, but it’s awesome. I made some again yesterday:

Yes. Homemade Ice Cream. Without a machine. With just 2 ingredients. Oh baby. The instructions are here. I’ve made it twice. Over the summer we had a crazy raspberry patch in our rental house, and I made ice cream with graham cracker chunks, cream cheese, chocolate chips and fresh raspberries. Delicious. Last night, I made their cinnamon roll version. I tried a teeny-tiny spoonful this morning and it was also. Delicious. Go make some. You need whipping cream and sweetened condensed milk.

As soon as I have my own place again, I am absolutely starting this. Organized home challenge. Having moved so many times, and usually in just a few days, our stuff is a little bit messy. Plus, even though we have downsized every single move, we could still do it again. I was clicking through it for awhile yesterday, you know, after I got back into Pinterest!!!

I think this is such a cool idea. Using a regular ol’ L bracket to make a literal book shelf. Imagine some cool vintage cookbook as a shelf in your kitchen! Or something equally awesome!

This just makes me happy. I mean, why shouldn’t your laundry room be beautiful? We know how much time we spend in there! Seriously though, a chandelier?!?!? Love!

Finally, another happy thing. They didn’t have room for a full out sewing/craft room, so she used a closet. Isn’t it brilliant, and lovely!? Seriously. I cannot wait to have my own place again. It’s been over a year of shuffling around, and Pinterest has not helped Smile

As always, if you want to come follow me & Nat on Pinterest, our buttons are on the side. If you don’t know what Pinterest is, go look at this. If you want an invitation, leave us a comment or email us with your email and we’ll get you one! Have a fabulous weekend!

By the way, if you're looking for some ideas for New Years Eve, go look at my board for it here. I'm sure I'll be adding more throughout the day too!

Pin It!

Wednesday, December 28, 2011

Sock Sleeves and Leggings

I have five boys.  My baby has lots of hand-me-downs.  It happens.  Right now, he is fitting into my #4’s Summer clothes.  They aren’t working out too well for Winter.

My friend is having the same problem with her little girl.  Thanks to a couple of pairs of dollar store socks, I’ve come up with a cheap solution.

sock sleeves and leggings (1)

These are both super easy, and the leggings are even no-sew!  Score!

sock sleeves and leggings (2)

Start off with some cute knee high socks from the dollar store or some from your own stash.

sock sleeves and leggings (3)

Cut off the feet.

sock sleeves and leggings (5)

Take your raw edges and give them a good stretch.  This will create a nice, rolled edge.

sock sleeves and leggings (6)

Ta-da!  You’re done!  These leggings can be worn with the rolled edge at the top or bottom of your baby’s legs.  It’s completely up to you.

sock sleeves and leggings (15)

See how cute and warm?!  Now onto the sleeves.

sock sleeves and leggings (8)

Take your socks and measure them with a long sleeved shirt that fits your baby.  Mark where the shoulder seam is.

sock sleeves and leggings (9)

(socks without a heel will work much better for sleeves.)

sock sleeves and leggings (10)

Cut along the line you just drew.

sock sleeves and leggings (11)

Slide the sock into the sleeve.

sock sleeves and leggings (12)

Pin the sock to the shoulder seam.  Stitch the sock into place and repeat with other sleeve.

sock sleeves and leggings (13)

If you’re doing this for an older child with longer arms, just cut the feet of the socks off and stitch right to the bottom of the short sleeve.

sock sleeves and leggings (17)

Fast, cheap, easy, cute and warm.  What more could you ask for?  Maybe a snuggle from your baby, or a full night’s sleep, but I can’t help you out with that.  Sorry!  :)

sock sleeves and leggings (16)

Now you have a two inexpensive ways to Winterize your baby’s Summer wardrobe and keep your little cuties warm!

sock sleeves and leggings (14)

signature nat

Pin It!

Friday, December 23, 2011

Fab Five Friday

It’s time for my “Fab Five Friday.”  This week has been an emotional rollercoaster with Christmas coming up, doctor’s appointments, kids out of school and the passing of my Grandpa.

Since this week was so crazy, I turned to Pinterest for laughs, not inspiration.  It’s about time I came clean with y’all.  I am a geek.  There.  I said it.  You can check it out HERE if you really want to!  :)

So, without any further ado, here’s my Fab Five Friday!

101682904056258038_dc2u1F9K_b

190417890464243503_IIoAxntk_b

190417890464243555_x9loaVL5_b

(It says “Those WERE the droids I was looking for…)

121667627402766754_p6D8yd0v_c

And my absolute favorite:

158048268142570886_otKTE0tr_b

Whenever you have a week like I did, remember

106186503683581959_UIGPhuL0_c

Have a very Merry Christmas!

signature nat

Pin It!

Wednesday, December 21, 2011

Necktie Tee

neck tie tee shirt

Our cousin, Becky, is expecting her third baby.  What’s better than that?  She’s expecting her third boy!  Yep.  She’s totally copying me!  Just kidding!  I am completely excited for her, and this idea is for her.

This little shirt is fun, fast and easy.  Here’s how to make it:

neck tie tee shirt (1)

My little guys gave my Hubsters this necktie for Father’s Day.  It came with a silk handkerchief, which would have never been used, but I had this idea.  You don’t have to use a silk handkerchief.  Any fabric would work.

neck tie tee shirt (2)

All you need is a little bit of fabric and a matching tee shirt.

neck tie tee shirt (3)

Cut your fabric into two tie shapes.

neck tie tee shirt (5)

Stitch the two pieces together and press the raw edges.  If you’re using cotton and want the frayed look, you don’t have to press the raw edges.

neck tie tee shirt (4)

Use some spray adhesive to position the tie onto the shirt.

neck tie tee shirt (6)

neck tie tee shirt (7)

Pin it into place for added security.

neck tie tee shirt (8)

Stitch around the tie, and you’re done!  You can use a decorative stitch, a straight stitch, or whatever you want.

neck tie tee shirt (9)

I used this stitch, and I like the way it turned out.

neck tie tee shirt (10)

It looks even better on my littlest man!  I wanted a picture of my two handsome fellas together, but this was all I got:

P1040938

Oh well.  I tried.  I made a bunch of these for our family pictures last year.  I used cotton and left the edges raw. 

Boys

I love the way the shirts washed up, but mostly, I just love what’s wearing them!  :)

I may not be posting on Friday.  Our sweet Grandpa passed away.  So, if I don’t see you before Sunday, have a very Merry Christmas!

signature nat

Pin It!
Really quick...Megs, you won the gumdrop ornaments, but I haven't gotten an address! Can you please send me your address?
2craftycousins at gmail dot com

Megs said...

I have told all my facebook friends how cool this web site is.

Pin It!

Tuesday, December 20, 2011

The Dollhouse!!!!

Once upon a time, in about July, a girl was shopping at the DI with her kids. Lo and behold, she came upon this. For $5. True, it needed TLC, but it had good bones, minus a few screws here and there.

Doll house_001

I’ll describe what I did as I’m going, and then I’ll show you the finished project. This was a HUGE project! But, considering the grand total was around $10 (including the $5 for the dollhouse), I’d say that’s pretty awesome wouldn’t you?!? I primed and painted the whole thing. My hubby was disappointed I painted the wood, but it was gouged and scratched with a pen. So, I painted it. I painted all the rooms, laid down flooring (hee hee, sounds so real, doesn’t it), and then built almost every single piece of furniture. Just made it up as I was going… Let’s start with the top room:

Dollhouse (3)

I built the bunk bed out of 1/4” MDF (my mom gave me a bunch of scraps of MDF she had) and dowels. I cut out foam for the mattresses, and covered them with a “sheet” (white fabric hot glued on), and made a bedspread and pillows. I also made a gumdrop pillow, because it’s just so fun!

Dollhouse (4)

I made a little memo board to hang up with cardboard, fabric, ribbon, and hot glue. See that cute little sewing machine? It actually spins, and was 50 cents at the DI. I also bought that little turquoise chair for 25 cents. I cut a little picture my daughter had colored and turned it into a picture above the memo board.

Dollhouse (5)

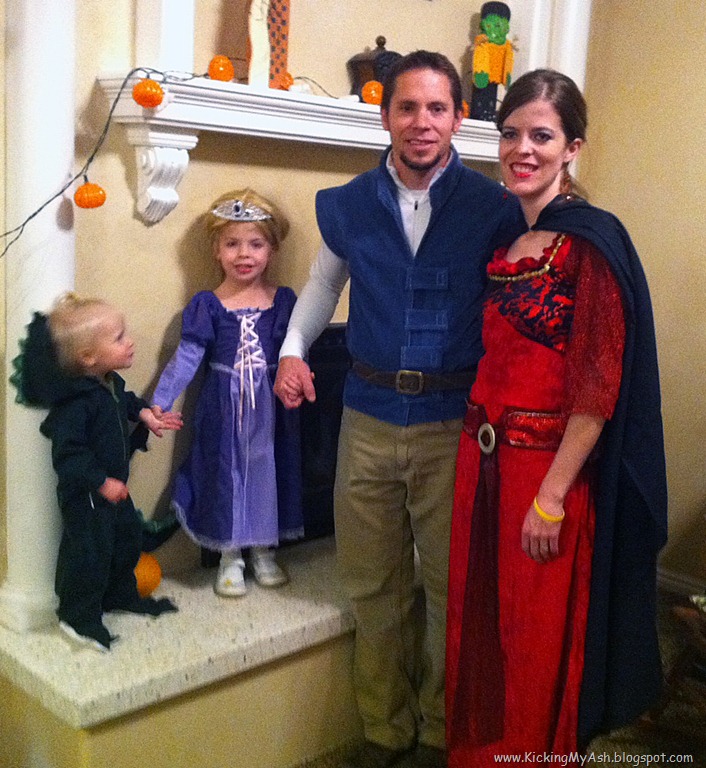
The wallpaper is mod-podged wrapping paper that I liked the look of. The “carpet” is some velvety upholstery fabric I got from my grandma, that I also used for my hubby’s Halloween costume here…

Moving down a floor…The water closet. Bathroom. Etc..

Dollhouse (6)

I still want to find a shower head looking thing for above the bathtub. I made everything in here, except the mirror is an old makeup mirror I found. I painted the floor gray, and then mod-podged squares of cardstock that I had decorated to look like tile, and cut up. I couldn’t find any paper I liked the look of at the store. The paper cost about 10 cents. I also mod-podged the swirly designs on the wall, cut out from my mom’s Cricut…

Dollhouse (8)

The bathtub is a 2x4 block of wood with a punch of holes drilled out. It’s not my favorite, but it will work for now. The toilet is a block of wood with a roundish piece glued to it, and a piece of a lotion bottle I saved from here glued underneath. The sink is a block of wood, with an L-screw for faucet, and an egg carton basin.

Dollhouse (9)

None of the furniture can go right against the wall unless I cut a chunk out of it because it’s got raised edge, as you can see from the picture. I put 2 beads under the tub for feet so it can go right against the wall. I painted some felt in an ombre fashion for the rug.

Dollhouse (13)

The lights are a tongue depressor cut to size with 4 rose-looking beads glued to it.

Dollhouse (7)

I had wanted to build some stairs to go from the bathroom up to the bedroom, but I didn’t have enough scraps, so I may finish that later. Then, I used the stairs to hang a shower curtain for the bathtub…Smile

Dollhouse (10)

The master bedroom, as I like to call it. It’s got a picture of our family on the wall, and a mirror that I made a frame out of popsicle sticks. The “carpet” in here is a textured black fabric I hot-glued down. The bed was made from MDF, and I made the mattress and bedspread like the bunkbed. The nightstands are pizza toppers (you know they put in the middle of the pizza so it doesn’t get smashed to the lid?), cardboard circles, ribbon around the edges, and a swirly modpodged on top. The lamp is from egg carton, with the base being a nail and 2 beads glued together.

Dollhouse (11)

I made the chandelier out of beads, wire, and a broken chain I had lying around. Just glued everything together….

Dollhouse (12)

Hung from the ceiling with an eye ring. You can now go outside onto the deck.

Dollhouse (14)

I hung a curtain from a bamboo skewer and cup hooks to make it different from the inside. I laid down the brick by painting it white, and then mod-podging red rectangles down for bricks. The benches are blocks of painted wood with pillows I made on top. The egg carton planter has silk plant leaves glued in to make the plant.

Dollhouse (15)

Nice retreat, right?

On to the downstairs. There’s a kitchen.

Dollhouse (24)

There’s a pencil box refrigerator, painted white with Krylon plastic spray paint (75 cents at the DI), a block of painted wood with a hole cut in the top for the sink, a block of painted wood for the oven, and an old Mentos gum container for a garbage. I painted the floors on the bottom to make it look like hardwood. I didn’t have the brain power or wood left for cabinets, so I hot glued some painted paint mixing sticks (you know that you get for free when you buy paint?) and cut them to make floating shelves instead. So far, they’ve got a little cup hot glued on there. I may make some little plates out of cardboard before Christmas just for fun, we’ll see.

Dollhouse (27)

The felt is painted with a stencil I had made for another project in 2 colors.

Dollhouse (25)

The sink has a faucet from an L-screw, like the bathroom, but I added beads hot glued on for the handles. The oven has a toothpick cut to size, with a towel sewn on, for the oven handle. The top is cardboard circles, and beads for the controls. I drew on the drawer, and glued another toothpick for it’s handle, and painted the window on the front.

Dollhouse (26)

The light is a tongue depressor with buttons hanging down from fishing line. I mod podged swirlies on the ceiling too, just for fun.

Dollhouse (22)

I built the table by cutting a square from MDF, and gluing it to a toothbrush holder I found at the DI (75 cents). I made the chairs with glue and MDF, and painted them red, then mod-podged little swirlies on them (what? I didn’t have stencils, and it adds a nice touch!). I made the rug by cutting a stencil out of cardstock and painting on felt.

Dollhouse (23)

I made the piano from the MDF, and just glued all the pieces together and painted it. I drew the lines on with a piece of paper (no rulers were small enough to fit even sideways!), and made the piano. The “TV” has Toy Story playing, one of my daughters favorites. I actually goofed up a little. I wanted pictures in the dining room, and the TV in the family room, but I glued them on and couldn’t switch them by the time I remembered. Oh well! I guess they eat while watching TV.Dollhouse (21)

I made this chandelier out of wire, beads, and hot glue. Took a bit of time Smile

The family room.

Dollhouse (16)

The lamp is made from a dowel, piece of round wood, and an egg carton. I made picture frames out of cardboard and painted them. The 2 red pictures are my daughter’s artwork that I cut up and framed. The plant is from an egg carton and silk leaves like the other one. I made the fireplace with a piece of MDF for the mantel, and the sides and underneath the mantel are tongue depressors and popsicle sticks layered for depth. I mod podged tile from the bathroom around the edges, and printed off a picture of a fire and glued that in. The couches are made from MDF, glued together, quilt batting, and then fabric that was half sewn, half glued.

Dollhouse (18)

I made the cushions and pillows with the sewing machine and stuffed them. The yellow cabinet was another DI find for about 50 cents. It had the one lonely cup glued to it, so I took it off and painted the cabinet, then cut off the bottom a little to make it fit in the house.

Dollhouse (19)

I hung the curtains with a bamboo skewer cut to size, and sewed fabric to go on them. I still need to tie a piece of ribbon around them to finish them. Oops. I made a front door, but I still haven’t found the right hinges, so it’s not hung.

Dollhouse (17)

Looking in the front door. Smile

Dollhouse (20)

The ceiling fan is made from beads, buttons, a bamboo skewer, and the blades are cut from a milk jug.

K, just to review. Before:

Doll house_001

Just in time for Christmas After:

Dollhouse (2)

So what do you think? I tried to make everything super durable, and if it’s not, then it was basically free to make, so I can replace things, or fix things, as needed.

Dollhouse (1)

I’m not lying when I say I wish I could live here!

If you want any more details about something, just email me! There's a ton of measurements, and I really was making it up as I went, so if you need specifics, let me know!

linking up to:

Today's Creative Blog

Pin It!
Related Posts Plugin for WordPress, Blogger...