Thanks for stopping by! We're two cousins who love to craft on the cheap and share our ideas. We'd love for you to stay awhile, pull up your Pin it! button, sewing machine, and let us know what you think!

Tuesday, January 29, 2013

How To: Repair a Coat Zipper

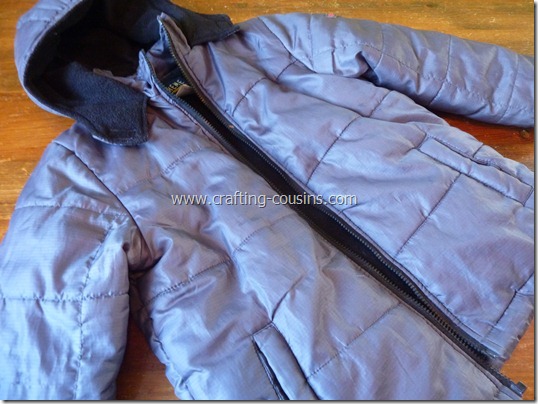
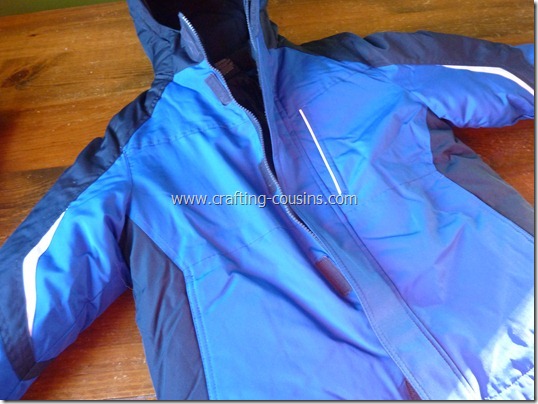
This Winter, we bought all of our boys new coats.

We’ve been battling Deege’s zipper since almost the beginning.  It started breaking after he’d worn it a few times and exchanging the coat wasn’t an option.

We kept that zipper working until it’s last dying breath.  I decided to replace it.  It’s so easy, I thought I’d do a tutorial on it.  Besides, replacing a zipper is much, much cheaper than replacing a coat.

Ready?  Measure the zipper that needs to be replaced.

How to replace a coat zipper tutorial by The Crafty Cousins (1)

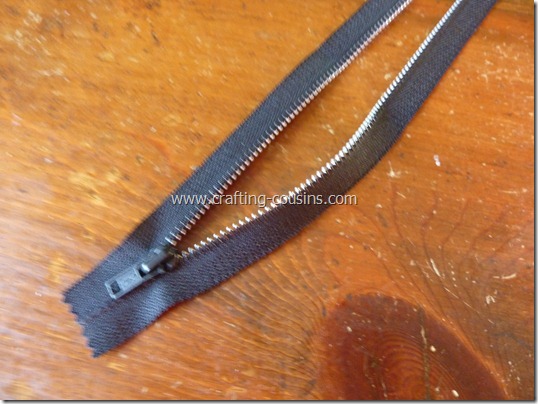
Buy a coat zipper in a matching color and length.

How to replace a coat zipper tutorial by The Crafty Cousins (2)

I bought mine online.  My nearest craft/sewing store is an hour and a half away.  Boo! 

How to replace a coat zipper tutorial by The Crafty Cousins (3)

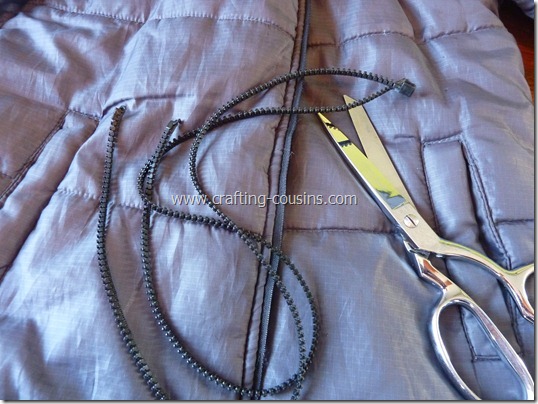
Cut the broken zipper off as close to the teeth as you can.  You could just unpick the zipper, but this was faster.

How to replace a coat zipper tutorial by The Crafty Cousins (6)

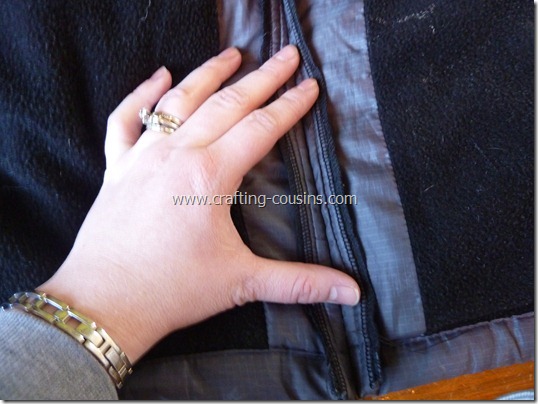
Serge the raw edge to prevent fraying.

Measure where you want your zipper and get ready to pin everything into place.

How to replace a coat zipper tutorial by The Crafty Cousins (11)

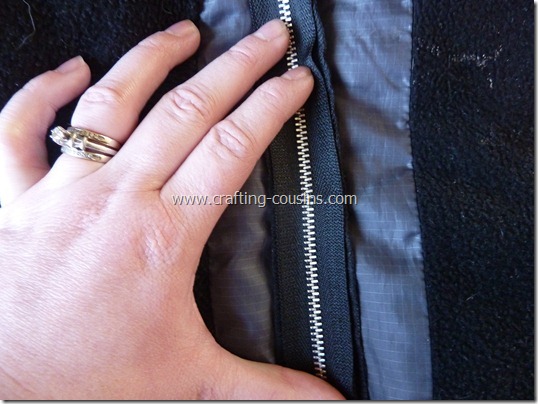
Wait.  Open your zipper before you pin.  It’s best to have it out of the package.

How to replace a coat zipper tutorial by The Crafty Cousins (13)

Now, line it up where you want it and pin it into place.

Wait.

Again.

What’s up with this blasted zipper?

How to replace a coat zipper tutorial by The Crafty Cousins (18)

Aaaarrrrghhh!!!

It isn’t a coat zipper!  Stinking website!  It should have had pictures!  Dang!  That was my only zipper.  I don’t have Ash’s problem of hoarding zippers.  If I did, this would be a non-issue. 

Maybe I could borrow one from her!  Only…she lives 3 1/2 hours away…

Well, great!  Now what?!  It’s 10:30 p.m., the stores are closed, and the coatless child needs a coat for school in the morning.  I mean, this past week it’s been a nice, balmy TWENTY DEGREES BELOW ZERO, so a jacket isn’t going to cut it.

Think…

…think…

…think…

Well, the nearest Wal-Mart is 30 miles away, and they might have a zipper.  But what about school in the morning?

…think…

…think…

…think…

SNAP!!

I’ve got it!  I’ll just sew the coat shut, but only 3/4 of the way.  We’ll turn that coat into a pullover…just for a day…then I’ll get that zipper fixed in no time!

So, that’s exactly what I did.  Deege thought his “pullover” was awesome, and off to school he went.  (I had to resort to bribery to get him to wear a scarf to cover the opening)

Once all the boys were safely on the bus, Monkey and I bundled up and made the 35 mile drive to Wal-Mart.

Dang.  No zippers.

Now what?! 

The kid needs a coat.

I could pick a zipper off of another coat…

…maybe stop at the thrift store, pick up a jacket and use THAT zipper?!

I just don’t know.

Dang.

Kindergarten gets out in 45 minutes.  Thirty five of those minutes are just driving time…

…and it’s snowing, so that’ll slow me down…

So I did what mother in a hurry would do…

How to replace a coat zipper tutorial by The Crafty Cousins (22)

I just bought him a new coat!  :)

Good thing, too, because he and a chain link fence got into some sort of battle at recess, and his coat sleeve was ripped beyond repair.

Goodness.  Boys!

Well, my friends, THAT is how you replace a coat zipper!!

;)

signature nat

Pin It!

Monday, January 28, 2013

DIY Flower Canopy

Okay, here’s yet another post about my daughter’s fancy room. It’s been an involved process! But I am working on about 4 other projects simultaneously, so I will have some other non-fancy stuff soon.

She wanted a canopy, if you’ll recall.

So, that was actually a really fast thing to do. I had everything already. I just glammed it up a bit more than just regular tulle. I’m sure you’ve seen these floating around, specifically like this:

(source)

(source)

(source)

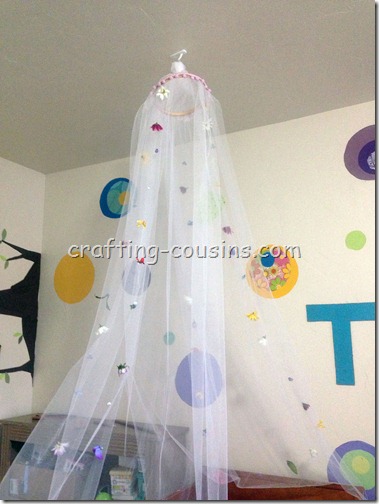
So, I got about 20 yards of white tulle, between my 2 princesses, 2 embroidery hoops, pompom trim, and some silk flowers. I put the tulle inside of the embroidery hoop when it was folded in half, and put a rubber band around the halfway part. I hot glued pompom trim onto the embroidery hoops. Then, a couple of hours of movie watching with the husband, I pulled silk flowers off their stems and sewed them onto some fishing line, tying knots around each one, until I had 4 really long (read: about 12 feet each) flower strings. I put those into the embroidery hoops too.

Canopy (2)

Canopy (4)

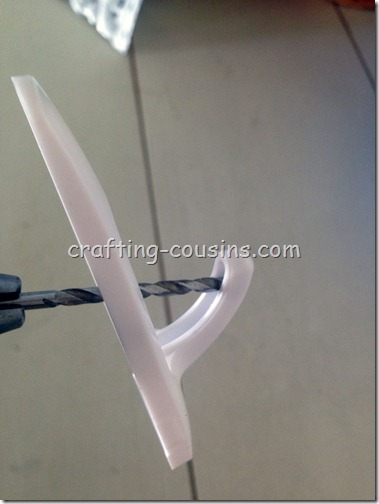
Now, the real trick was figuring out how to hang it from the ceiling in our rental…. So, I got a large command hook and drilled a hole through it.

Canopy (6)

It was about 1/8” or 3/16” drill bit. Just whatever fits between the ridges behind the hook. Look at one, you’ll see what I mean.

Canopy (1)

Nice clean hole in the Command hook. I emailed them, they don’t have any products yet for hanging things from the ceiling. They did tell me not to hang anything over a bed, so don’t hold them or me responsible if you choose to do so. That’s why I used a large hook because the weight limit was a lot more, even though these don’t weigh much at all.

Canopy (3)

Then I put it on the canopy using fishing line again. Just looped it through the hole and through my rubber band loop and tied some knots.

Canopy (5)

Voila! That’s French, and so very fancy. They love their fancier beds, and since nothing is near them laying on the bed, I’m not worried about strangulation or any such nastiness.

Pin It!

Saturday, January 26, 2013

What I Wore Sunday: Week 51

Wow!  Just one week left of this challenge!  What in the world am I going to wear to church after that?!  Oh, that’s right…I’ve got a closet full of 52 different things to wear!  :)

frame to match teal and white

…52 weeks of shaking up the wardrobe…

The Rules:

  1. Wear a different outfit every Sunday.

  2. Incorporate at least one article of clothing or accessory that was either refashioned, sewn myself, or handmade.

  3. Outfits can be worn more than once; just not the same way

This is what I wore Sunday:

week 51

Shabby Apple dress--worn yet another way.  I’m so glad I bought that!  :)  I’m wearing it with that maternity sweater I turned into a a 3/4 sleeved non-maternity sweater.  I liked this outfit.  It was cute, comfy and warm.  What more could I have asked for?!

signature nat

Pin It!

Wednesday, January 23, 2013

Easy Scarf with What I Wore

Black, White, Red (2)

Top: Black and White Refashion Shirt, Scarf: handmade, Pants: Target, Purse: handmade by my Sister-in-law, Red Bracelets: ??? Can’t remember it’s been 7 years…. Red Shoes: American Eagle, purchased from DI

Red Sunglasses

And for my fun part, Red Sunglasses from Amazon, Coat from Wal-Mart.

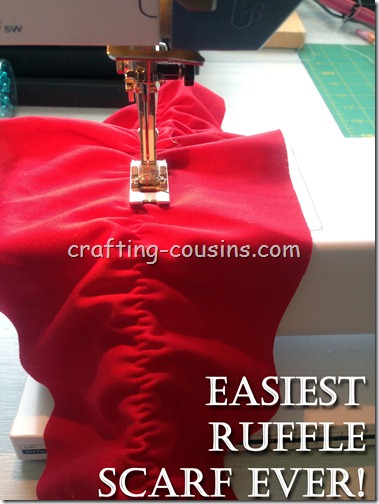
So that scarf? I decided when I was getting dressed I needed a red scarf. Wanna know how easy that is to make?

Make a Ruffle Scarf copy

Cut a piece of fabric 5-6” strips, and sew the strips together to get around 90”-120” in length. If it’s knit, that’s it, if it’s gonna fray, finish the edges. Sew down the middle with elastic for shirring it. Then, sew right next to that line again.

Scarf Sharpie tip copy

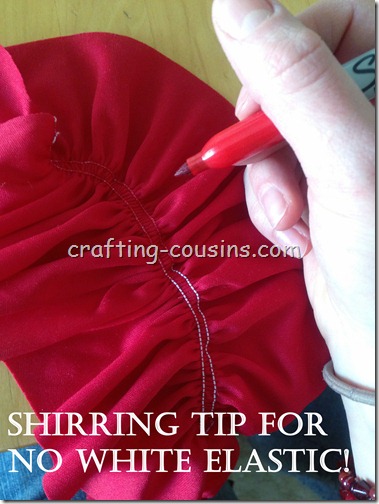
Want a great tip? With a scarf, you don’t want the elastic coming through, and you don’t want to keep adjusting your scarf to hide the white. So, color it with a matching sharpie! Voila!

If you want a more detailed tutorial for the ruffled scarf, here’s a good one at Made. Easy Peasy, especially with knit fabric and a rotary cutter!

Pin It!

Tuesday, January 22, 2013

Who Needs Hostess? Part II

Remember last week when I showed you how I made copy-cat Twinkies?  Well, this week, I’ll show you how to make copy-cat Hostess Chocolate Cupcakes…but with more taste, less preservatives, and more awesomeness.  Ready?!

Hostess recipe from The Crafty Cousins

My oldest asked me to replicate the Hostess Cupcakes for his 12th birthday a few weeks ago.  I started off my making Devil’s Food Cupcakes

Follow the recipe exactly as shown on the website, except divide your batter between 2 lined muffin pans.  This gave me 24 cupcakes.  Don’t make the frosting in the recipe. 

…unless you want to, then knock yourself out!  I used Chocolate Ganache Frosting to frost my cupcakes.  Mix up your Ganache and let it cool to room temperature.  Don’t frost the cupcakes yet.  You need to fill them first.

I used this delicious, heavenly Perfect Cupcake Frosting and Filling from my best friends at Our Best Bites to fill these cupcakes.  I doubled the recipe.  Reserve about one cup of frosting to pipe the little swirly pattern on top of the cupcake later on.

Now, you can fill these the same way I did the Twinkies:

Hostess recipes from The Crafty Cousins (26)

Hostess recipes from The Crafty Cousins (28)

Hostess recipes from The Crafty Cousins (29)

Hostess recipes from The Crafty Cousins (31)

…or you can use one of these:

…and just inject the filling into the top of the cupcake.  Whichever you prefer.

Once the cupcakes are filled, spoon the room temperature Ganache over the top of the cupcakes.  You’ll probably want to do this 2-3 times for a thicker layer of frosting.

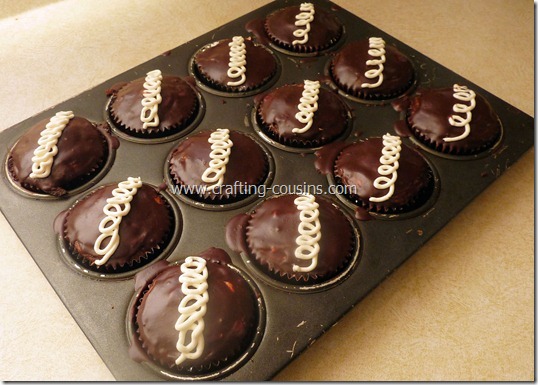
Once the Ganache has set up, pipe your little swirly design on the cupcakes with your frosting tips.  A Ziploc bag with the corner snipped off works, too.

Hostess recipes from The Crafty Cousins (13.1)

You don’t have to do the swirly pattern.  On my second pan, my boys and I piped baseballs, basketballs, footballs, smiley faces, etc…  It was a lot of fun.

Hostess recipes from The Crafty Cousins (22)

Hostess recipes from The Crafty Cousins (25)

Drool…I totally want some now.

Of course, if you don’t want to go to all this work (I promise, you’ll miss out on an incredible taste experience…) you could always pick up a box of these:

So, really?  Who needs Hostess?!  ;)

Not me!

signature nat

Pin It!

Monday, January 21, 2013

Fancy Bedspread

How many of you remember the bedspread I made last year for my baby?

This one?
And do you remember my oldest daughter’s list of demands for her new Fancy room?
Fancy Nancy Room
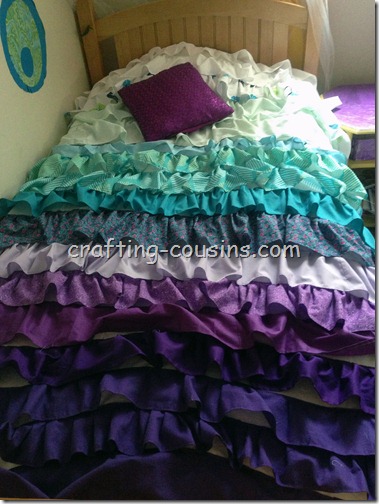
Well, she decided that her bedspread wasn’t fancy enough. To refresh your memory, I had made it from some of the 36+ baby blankets we got when she was born.
Flannel Bed
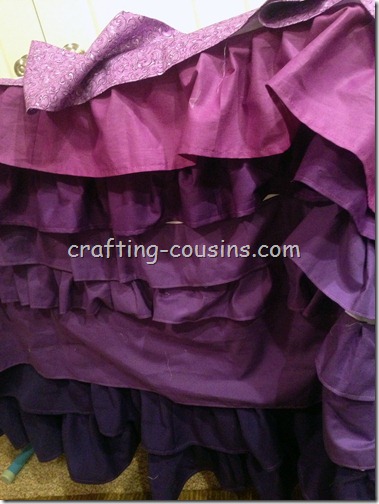
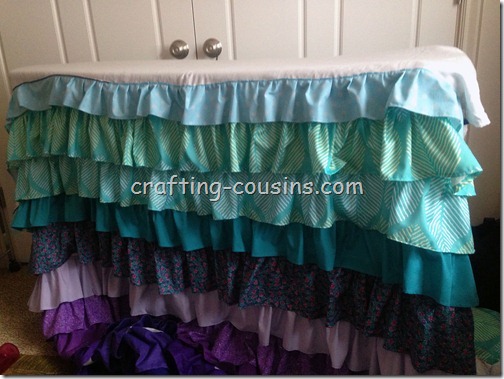
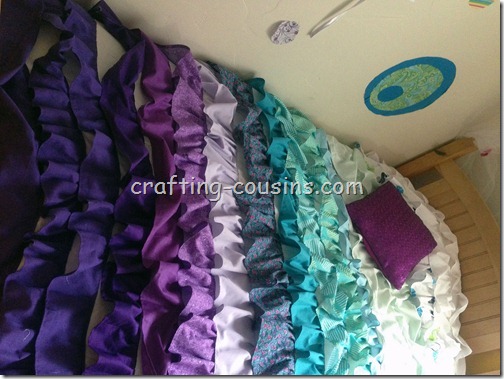
Okay? So she told me she wanted a bedspread like her sisters, but not pink. Of course it was purple. So, I used a queen sheet for the base, and pulled out fabric to make me some ruffles. We went from a dark purple (but we call it violet because that sounds fancy) to turquoise (again, fancy), to white. Basically, I just cut strips, anywhere from 5” to 8” thick, depending on what gave me the best, longest, strip. Yes I did do some math. Your teachers were right. You do use it. Then, when I had everything cut and sewn into long strips, I ironed a 1/4” hem all around. Then sewed around 3 of the 4 sides, leaving the one that was to be sewn onto the sheet open. Then I laid them all on the floor with the sheet spread out, and started drawing lines across the sheet where the strips would go. I overlapped the strips by at least 1”. And then I started sewing my strips onto the lines, pinning in 1/8s as I went.
Ruffle Bedspread (1)
I laid it over my ironing board to pin on the next piece, then sewed it.
Ruffle Bedspread (4)
That’d be a pretty cool ironing board, don’t you think?
By the way, when I got up to the the last 2 rows, I remembered I had used a ruffling foot on #2’s bed. Did I on this one? Nope! I’m special like that. It took A LONG TIME! But oh well. Princess #1 loves it.
Bedspread
I posted this on Instagram (@ashleejuanita if you want to follow along) when I finished.
Ruffle Bedspread (3)
With her new purple sparkle pillow.
Ruffle Bedspread (2)
One more thing checked off the fancy room list!
Pin It!

Saturday, January 19, 2013

What I Wore Sunday: Week 50

Eeek!  Just two more weeks of the What I Wore Sunday Challenge!

frame to match teal and white

…52 weeks of shaking up the wardrobe…

The Rules:

  1. Wear a different outfit every Sunday.

  2. Incorporate at least one article of clothing or accessory that was either refashioned, sewn myself, or handmade.

  3. Outfits can be worn more than once; just not the same way

This is what I wore Sunday:

week 50

This skirt was a few dollars off the clearance rack.  Fabulous!  …except that it was a sixe XXL.  No worries!  I bought it anyway and took it in at the side seams.  It’s now a medium.  I also made my necklace. 

I got a lot of compliments on this outfit, but it was just okay for me.  I don’t love the way the shirt fits, hence the belt.  The belt is cute and all, but I think I just need to see what I can do to make the shirt fit me better.

I’ll get to work on that right away…

See ya next week!

signature nat

Pin It!

Friday, January 18, 2013

Winter Vignette

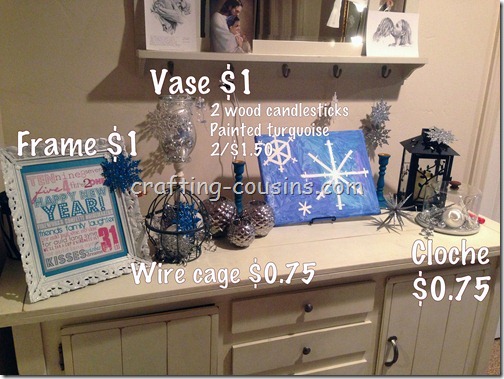
I like calling my décor a vignette. It sounds so hoity toity. When really, it’s anything but. I can’t call it a mantel though. Table Spread? Buffet? Anyway, I don’t want to go straight to Valentine’s day after Christmas, so I like to either put out some winter-esque décor, or nothing until Valentine’s. Paper kept getting piled on the buffet, so décor it was! I went with silver, white, and shades of blue to make it wintry.
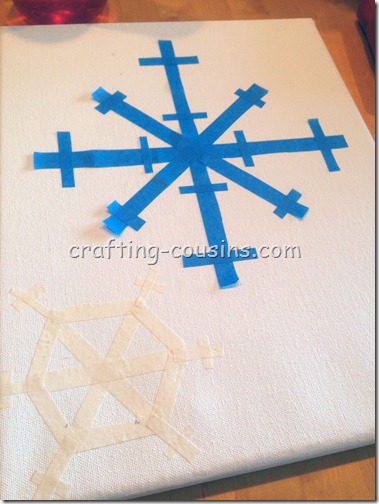
Let’s start with a fun winter craft you can do with the kidlets, on a snow day. And make lasting art. Get a blank canvas. Mine was on sale at Michaels. $3 for an 11x16. Sweet.
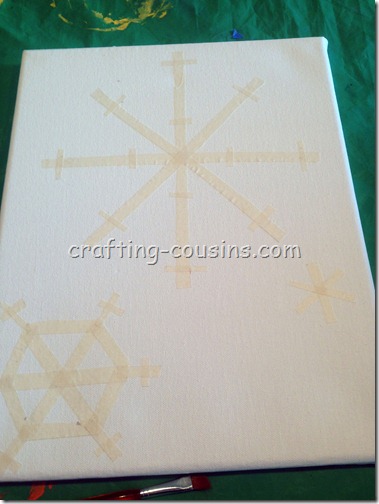
Tape off some shapes.
Snowflake Art (1)Snowflake Art (2)
Painter’s tape kept curling off the page, so masking tape won. It did bleed a bit though, so we’re not going for perfection.
Snowflake Art (4)
Give the kids some paint. We did about 6 shades of blue and let them go hog wild. I just reminded them to not get big globs, and paint on the sides.
Snowflake Art (3)
Peel up the tape. Voila! A fun piece of art! I think it needs glitter, so I’m going to pick up some silver on the top. Wanna see the whole vignette?
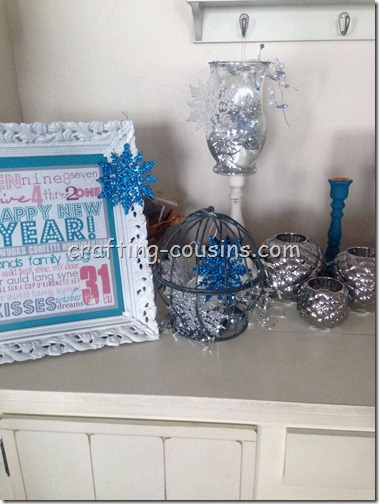
Winter Vignette (1)
A New Year print in a thrifted frame, a wire cage, snowflakes scattered all around (bought from Michael’s last week…$0.25 for 2), with some white ornaments I already had. I made the hurricane jar thing, and the pinecone votive holders were free from Tai Pan Trading.
Winter Vignette (2)
I painted a pair of thrifted wooden candlesticks turquoise.'
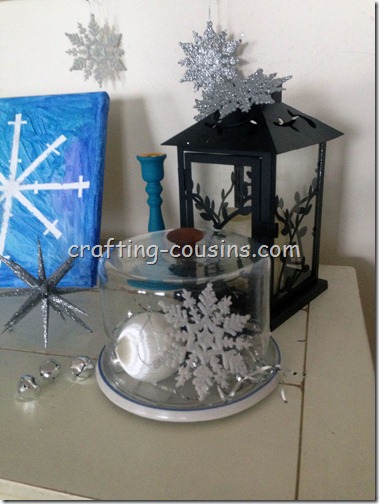
Winter Vignette (4)
The funky silver star was an ornament from Target this year. The black lantern is something my mom gave me a couple months ago.
Winter Vignette (3)
I think I either need to paint the knob on my thrifted cloche, or change it out for a funky one.
Winter Vignette (6)
We made a snowflake “wreath” from popsicle sticks the same day as the painting for a craft. I think it needs some glitter too...
Winter Vignette (7)
It was very stormy, so we had to do something!
Winter Vignette (8)
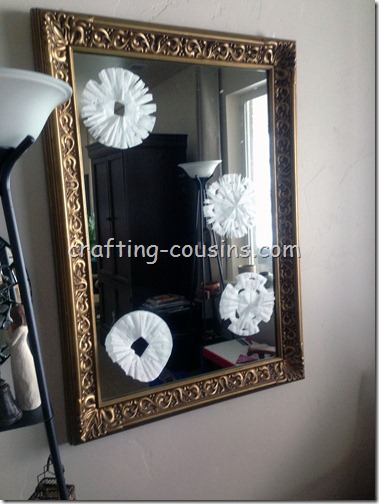
We also used coffee filters to make some snowflakes.
Winter Vignette (5)
And hung them on the mirrors.
I broke down everything that I bought at the thrift store. Cuz that’s how I roll. All the other stuff I either had, or bought off the clearance rack at Michaels/Target. Oh, the nice pop of bright red? My daughter’s Lip Smacker chapstick. Remember those?
Winter Spread
So the whole thing was super cheap, it’s kinda ridiculous. I think it was $8.25, without taxes. Easily less than $10. Mostly stuff I’ve hoarded in the past, and just pulled them together. Sweet. V-day will be coming out soon enough.
Linking up to:
CSI Project
Tatertots and Jello
The 36th Avenue
I Heart Naptime
Skip to My Lou
Pin It!
Related Posts Plugin for WordPress, Blogger...